images

Wrapping Up by jim lehmann

2025…another year….they seem to roam along like a coyote crossing a road. Upon first observation or knowledge, while neat, they soon slink back into some anonymous mode and out of sight.. They seem to skulk into the shadows and life moves on. Somewhat like a new year….sure, 2024 is gone and now 2025…..So upon first thought, you say….wow, what a fast year it was last year. And then you think that we are already well into January and it came and went without much notice. The year moves and much like the coyote, days past are just that, days past.

Where does that make my photography….well….it also moves along like a coyote caught in the headlights of my car. While I don’t try to make new year resolutions as ‘time itself’ is just a configuration that humans place upon our culture to live by, ….to plant crops by…to sleep at dark and wake in the morning etc…. the number itself to me is meaningless or the date. But it is a new year and looking back I found I am doing about the same thing this year as last (filing taxes too) regarding my photography. Last year and this year I used January as a time to sum up my prior year projects and push them into the home front and for me, that is in the fashion of a new zine.

Not just one Zine but three….all around 44, 48 & 52 pages. That is about as close as I will get to a new year’s resolution and it isn’t even that as I wrap up a few photo-projects and get my work out there.

The image below shows my recent initial order to MIXAM; my publishing company. These are certainly not large orders as I usually order a small batch and hand them out to people and if I get positive vibes, I can order more. Also, each one this year has a purpose.

For instance….the first zine is entitled 4 Evenings. These sepia photographs used a combination of film (Olympus Pen F and OM1) and Digital (Olympus OM D) where I captured an artists colony in Tucson AZ. I just wanted some odd shots which represent this warehouse/art colony. My intent is to return and with a second round (perhaps this year) capture stories of a few individual artists.

The second Zine is my Urban Lyfe Series 3. Shot in Philadelphia and all on film, I pulled from 70+ rolls shot in 2024 and all of it shot on film. These images reflect the third year in a row where I have taken my best urban shots and placed them into a zine. No doubt, there will be a Series 4 as I have a condo in center city within the heart of Philly, so I wander a lot while there. I am going to change my shot composition/emphasis just slightly this year.

The third Zine represents my ‘salt printing process’…..all of the photographs are from my work in the studio perfecting my salt printing technique. Dating back to the 1839 upon first introduction (185 years ago) I have gone a bit radical in my approach, but that is par for the course with me. I want to be different, not the same. All images have a slight sepia tonality and all were printing using various water colour papers plus a mixture of chemicals that I managed to dilute differently than others might, as well as placement in the sizing process of the paper. My studio has a UV light box, which makes this salt printing process have less variables.

—————————————————————————————————————————————————————-

That brings my 2024 to a close and now for 2025. What might be on the horizon?

First….my overall emphasis regarding shooting composition is going to change. More to come as there is no reason to give away ‘the store’….

Second, I am going to attempt to capture individual artists at the Steinfeld Artist Warehouse in Tucson, AZ. Again, I will match what I do in my upcoming Philly zine in terms of creating a new shooting composition/ emphasis. This is a tag-on to my first zine of 2024 “Four Evenings’ as I described above. I love the idea of these very creative artists and to represent them in an equally unique and creative way.

Third….I would like to build up my knowledge of the 1930’s and the Farm Security Administration (FSA) and teach a course on this topic. As evident by below (By the way, is that a color photo? I shot color? What….no way man…I shoot black and white) , I am just starting and certainly have books to read and photographers to research individually. I have other books ‘on order’ so my reading this year is pretty photo-based. Sorry Tom Clancy. But I have a natural love for history and photographs. What better way to meet my love, than to combine the two and the decade of the 1930’s in America represents a time during the Great Depression where images shot by a cadre of photographers can’t be put aside and forgotten. These are simply too valuable.

The Swing of Salt Printing by jim lehmann

I am here in my Tucson studio and have been working on salt printing. A few things come to mind.

First…I tried printing a landscape photograph of the Badlands in South Dakota which I took this past summer …a 35mm film captured with the Olympus OM-2sp. I happen to enjoy the photo. But I also have been showing it around and others are not overly crazy about it. So it has me wondering if I should even pursue more landscape photography using the salt printing process. I envisioned having a small zine of landscapes done in that manner. Will ponder on. Below is the photo.

The second thing that has come to me has been in answering a question I have had regarding why some images come out more sepia than others. I already knew that the longer a photo ‘rests’ after the final rinse, and with the addition of putting a coating on after it has dried, it turns darker in that final process. But I think it also has to do with when I prepare the paper with sodium or silver nitrate, if I force dry the paper by using a hair dryer or smaller space heater, than it comes out sepia it appears. If I just let the paper dry naturally, the sepia isn’t as strong. The image below has a sepia tinge to it, as I took a shot of this with my iPhone, so that is another thing entirely as in person, it is more black. Go figure. Also, the image below was not under the UV lights as long as I would normally as I wanted the person to come thru a bit more and not be as dark. So that too causes sepia. Too little time under UV lights. Lots to learn….each image has to be taken individually and understood.

And You Don't See Me? Right? by jim lehmann

Being a street photographer I am always amazed by how the vast majority of people have no idea of their surroundings. They are clueless… Are they Zombies? Are they Avatars from the future? ….Either way, they just lack any awareness of their physical presence and those around. These' ‘space cadets’ just walk around or stand or sit or look off in some direction and are pretty much there for a street photographers picking. Totally oblivious to that which surrounds them. For instance…take this couple below….:

There they are….about a foot away. Just staring. I am next to them and I have no idea of their names, where they are from….do they speak English? Are they Vegetarians? ….do they read books? Are they lovers? Do they prefer chocolate ice cream over vanilla? No idea….. But there they are, big as day.

Dah…take my shot…capture me. I am not posing in any way so a candid shot will turn out just fine….just fine. And yes, I did. I took their shot. In fact this is one of 4 shots I grabbed from them but I prefer this one as they are both looking ‘out’…..I like the closeness of it all. Just ‘Us”…hanging out…..far from good buddies.

Then on the other hand……

Zine Platforms by jim lehmann

I have been into ZINES for years…..and have not really struggled but surely had my eyes open to new ways to approach a ZINE in terms of pre-production. Pre-production is what many are not even aware of regarding a ZINE.

Yes, pre-production does involve taking images and the process, be it film or digital…. One can’t do photo zine without photos. But let’s say you have your theme or project and your images are in your files, or negatives are ready to scan. How about transferring that to a physical Zine?

This is where some pre-production once more occurs. Two parts to this process. First is the laying out of your photos as in some sort of contact sheet. In the old days of film, we would always create a contact sheet of our roll of film. Looking at this contact sheet we could determine what was good enough to be printed. Printing in the old days and viewing was a long (time wise) and a relatively expensive process with chemicals and paper etc, so very few negatives on any given roll was actually printed. Now, whether digital or film (I scan my negatives), I come up with some sort of digital file. In order to actually view my images on some broad spectrum, I need to create a contact sheet with all of my images that I ‘want’ or ‘perhaps want’ to use in an upcoming zine.

Below….is my most recent contact sheet I am using (not done with this zine pre-preduction phase). As you can see, this contact sheet has icons of multiple images. This allows me to quickly view my potential images to use. If I don’t do this, I can have a hundred ‘best’ photos from any given project all strewn within various folders and files on my computer. In essence, I wouldn’t know where to begin as I moved forward. Hence, this contact sheet.

Also take note that within or next to each image I have various aspects written in….Sometimes I use this data in my zine and other times not. But data such as F stop, ISO, shutter and focal length. As I put together my photo zine, I do so by connecting images that flow. This ‘flow’ might be subject matter, sequencing of when images taken, groupings or solo shots….whether the image is mostly black, or white or in between. All of this makes a difference in putting together the right visual appeal of a zine.

It isn’t about just tossing images in…. It isn’t about placing in sequential order of when I took the image. It is just….what makes sense to create that all important visual appeal. Now in this project, I have hundreds of photos, so after scanning (if film) or downloading….I had to open up each image to select what I thought matched my criteria. My criteria was spoken to in the previous blog, so return to my blogs and read that one.

Once I have my contact sheet printed out, and I might add data next to each image….I then have to decide….what is my first photo? Make sure you start off on the right foot. Capture your audience with the first few photos. But don’t just load up the front half of your zine with the good photos and then run dry as you get to the end. Carefully and craftily you have to spread your “WOW” photos throughout. Thus, this is where the contact sheet comes into play.

Now….okay….I am ready to go, right? Well….not quite. Have you decided on what software to use to put together your zine? You need something as you can’t just send your images to the publisher (online or local) without them knowing the direction you are taking. Thus, software allows you to piece together your photos, one by one….. place in text or any little drawn on images, or arrows or whatever…..Remember you are creating a book /zine…. so take the time in this creation process and make it stand out.

There are several software programs out there….. For instance for years I used PAGES which is free on my IMAC. While I got used to this software, it had its limitations and it was frustrating to move back and forth between pages, grouping and regrouping images and text….having things disappear on me etc…

So…I went looking on line….. I won’t provide you with a listing of software but will tell you I settled on Affinity Publisher. It was a one time $69 US dollar fee and not a monthly fee. I hate monthly fees. So for $69 I get my registration number which I can transfer to multiple computers so my IMAC is Arizona has it installed as does my IMAC in Philadelphia, as does my laptop. COOL! ….

I like Affinity for several reasons. First the $69 is cheap. Second….this is more user friendly in terms of setting up pages and moving pages around. Third, it has a ‘master page’ or pages, where I can create my own template to use for the entire project instead of inventing the wheel each page. Fourth, I can turn and twist images and text so it isn’t plain and dry and just straight on. I am creating something I want people to view, so I want to be ‘funky’ where funk is needed. Fifth….lots of room to grow. Tons of options, tons of things I have no idea exist in this software but room to grow. For instance, I can have backgrounds that are not one solid color but have gradients where colors meet, or blend or fade etc… That all offers a chance to enhance my final product.

So Affinity Publisher….. And, one of my goals is to get others on board with ZINES and teach this. So now I have a teachable software that is available for both PC’s and MACs and is relatively cheap,

Stay tuned…. my Melbourne Series is being worked on as we speak…..

FUNKY...general notes by jim lehmann

For some reason I have used this term (FUNKY) several times now in regards to a project I am working on. FUNKY…. from the onset I wanted images that were unique….not run of the mill, and a bit on the wild, funky side. Not polished for sure.

I am beginning to turn away from being polished. It appears that most everyone and including AI (the image cheating of all cheats )….Oh, think TOPAZ, has polished images but I want images where my creativity come into play. Most people lack creativity and that includes photographers, and AI isn’t quite there yet. I am still daubing on this funkiness issue and have been since completing my Paranormal project. The funkiness in me has come out and now it doesn’t want to go back in it’s hole.

Keep being funky….odd….connect to a theme, but do so without a sense of Normalism. I will continue to be a bit more realistic when I print with my salt printing process as the image needs high contrast and due to the heaviness of grain, when I print…..the image can’t be overly funky. My opinion of course.

Notes on———

Olympus Half Frame Pen F results.... by jim lehmann

The other day I took out my Pen F and shot a roll of 24….knowing that I would get more like 48 shots from it. I played with it, I worked it….I experimented with it. I shot 1.4 in broad daylight without a ND filter….I shot F16 on a cloudy day, I used a combination of shutter speeds accordingly etc…. The point was I wanted to see how shutter worked, F etc on my Pen F….as well as a new Zuiko 85mm equivalent lens I picked up from a Japan camera store as I compared it to the 38mm lens on the camera.

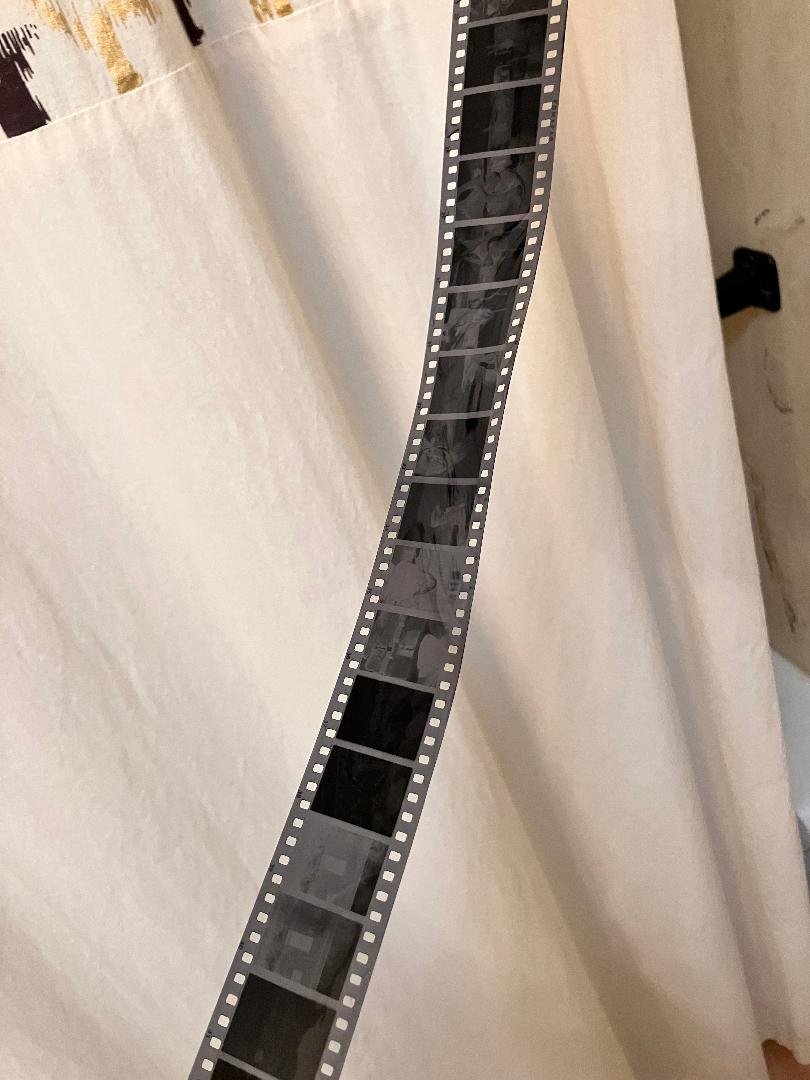
All told….I was pleased. As you can see by the negatives below, the images are vertical and not horizontal (although you can still shoot horizontally). And more importantly, they ‘came out’ :-) …. I was a bit worried since when I rewound the film it had an odd feel to it like I didn’t take many images. Not sure why, but that had me worried, so seeing the results below had me jump up and down.

It is important when experimenting with a camera, lens, situations….that journaling comes into your focus and this becomes a natural process to you. Journalling, especially when working on a project, adds a written history to your images. It helps, let alone it is fun…..to return to your journal after completion of a project and re-read what occurred. Journalling becomes the frosting on the cake, with the birthday candle stuck to it. After every single press of the shutter, I would immediately write down my settings, so when I started to review my negatives, I could see the settings for each negative. Sometimes I used two settings for each half frame set of images. I learn from my mistakes and put the time in ‘during the process’, to do just that. A portion of my journal is below.

So, that brings me to the end result…or what did I take away. With film, it is important to expose for the shadows so in some cases within my experimentation I over-exposed several stops. The importance of this stood out within my images. It was easy to casually view a negative without perusing my notes and be able to determine this. The Second thing I learned? The wide open lens on the Pen F (38mm) or….. (53mm equivalent) is sharper than the 60mm (85mm equivalent). One reason why I picked up the longer lens was I am going to be getting close to people and at the same time take multiple shots of them. The Pen F has a problem. It has a very loud shutter….which would even alert a bent old lady with two hearing aides that something was amiss. .So the 85 equivalent promised me the ability to shoot somewhat of a close shot, but at a distance, far far far away from the noise of the Pen F shutter. And not to be forgotten, since this project will be done in downtown Philadelphia, the noises of the city will help.

The shots below show some of my results. You can see the first paired shots, which were with the 60 (85)mm…are just a bit fuzzy. With a half-frame, you are bound to get more fuzziness regardless of lens, simply due to the size of the frame (half frame), but in the images below, it is noticeable . I also shoot using Fomapan which is not nearly as refined as TriX or Ilford 5p.

The second set of connected images is also done with the 60 (85), but the light was more exposed in this image from both frames. Notice though the difference in exposure between left and right images, as the angle was opposite.

The third pairing of images was done with the 38mm lens (53 Equivelent) and I believe is sharper …..It just goes to show you how much you can learn if you elect to burn a roll of film or two. I am not done learning my Pen F.! But I am willing to put the time in for a project in which I will be using the diptych technique…. Take care all…

More on "Street" by jim lehmann

in previous blogs I have spoken to several things that make for better ‘street work’…. One of them being ‘choosing the correct gear’ (camera and lens), while the other is access. So read a few blogs behind this one.

Another ‘street’ element to take into account is “Time’….

The same can be said for just about any venture one does for pleasure or work, but having the time and spending the time in the field is critical. If you are not ‘out there’, you won’t capture any images. That seems pretty basic. But surprisingly I see many people who want to be street photographers but rarely spend time in the field. Most lately, and one that directly relates to me is that I have a local meet-up group here in Tucson and soon-to-be in Philadelphia, and although multiple folks belong to the group and perhaps comment on photos, or post one or two of their own, rarely do they actually go ‘in the field’…

Without going into the field, essentially there is no growth opportunity. How can you get the hang of choosing the right gear etc, or….gaining access to a situation; if you are not on the street frequently. Being on the street allows me to see if the camera I brought along is worthy of what I am trying to capture. Or, the lens I have…. I know for a fact that when I go into a ‘parade’ situation or busy streets, that many times it is best to have at least a 50mm lens, and sometimes a 75-85mm. How did I figure that out? I know the way I prefer to shoot; I know what I am trying to capture….and by trial and error, I fknow my optimum focal length depending on the situation.

Without being on the street frequently and putting my time in, how do I learn how to gain access to some very tricky situations? How to shoot in a dark alley and be safe? How to be around groups of people at night? How to shoot pretty girls and not offend them? How to shoot candid shots and less reliance upon posed shots? All of that begins with and ends with; yes…you guess it….putting the ‘time in’ your photography and learning what there is that needs to be learned.

So time….such an easy thing. Now, I also hear photographers who tell me that they are burned out and don’t feel like going into the streets. Well, perhaps….. Perhaps also that street photography isn’t for you. Or, perhaps they fail to realize that it isn’t always easy to build up motivation to ‘put in your time’. I suffer from that as we all do. This isn’t any different from a painter, or sculpture or any artist at work. Sometimes you don’t want to put in the time. I get it….but I also know that when those unmotivated days show up, the only way to get around them is simply to take camera+ lens + film and go out on the streets. Admittedly it is easy for me to do this while in Philly since my condo there is downtown, as opposed to getting into a car and driving to your destination. Still though…..ask yourself. Do you want to be a good street photographer and if the answer is yes, well….you know what is required of you.

Diptych by jim lehmann

My next upcoming new project will involve diptych…… This is where you build a story using two frames that are close to each other …they connect in some odd manner. I will be using my film Pen F from the early 1960’s. This half-frame camera essentially takes vertical frames using the camera upright, and fits two images onto one 35mm negative frame. There is a small line that separates the two images within that one frame.

The half-frame Pen F fits this mode of creativity well (Diptych). First, since each image is half the size of a regular 35mm negative, it becomes more difficult to enlarge any one image. Sure, I can crop each individually but am thinking I want to keep both images ‘side-by-side’ and present the two, as one.

This way, I have an immediate connection to a story…. Those two images connect. It might be of a person where one image is close up, while the other is afar….or can be of an image scene where I view from opposite sides etc. I know I have done that in multiple cases such as this one below.

These two images were shot in Melbourne, Australia using a Leica Model 2 with Fomapan 400 film. While not a half-frame, the same concept applies. These two images fit….they connect. They use one person candidly captured from two different angles in this case.

But the idea of a half frame camera and my Pen F….intrigues me. While I am in Australia now, my Pen F is back in the states, so…..will be a few weeks before I get a chance to play with this concept and approach it with images , side -by side….. Stay tuned.